
Mounting a staghorn fern without crushing the growing point

In this guide (9)
Updated: 2026-09-08
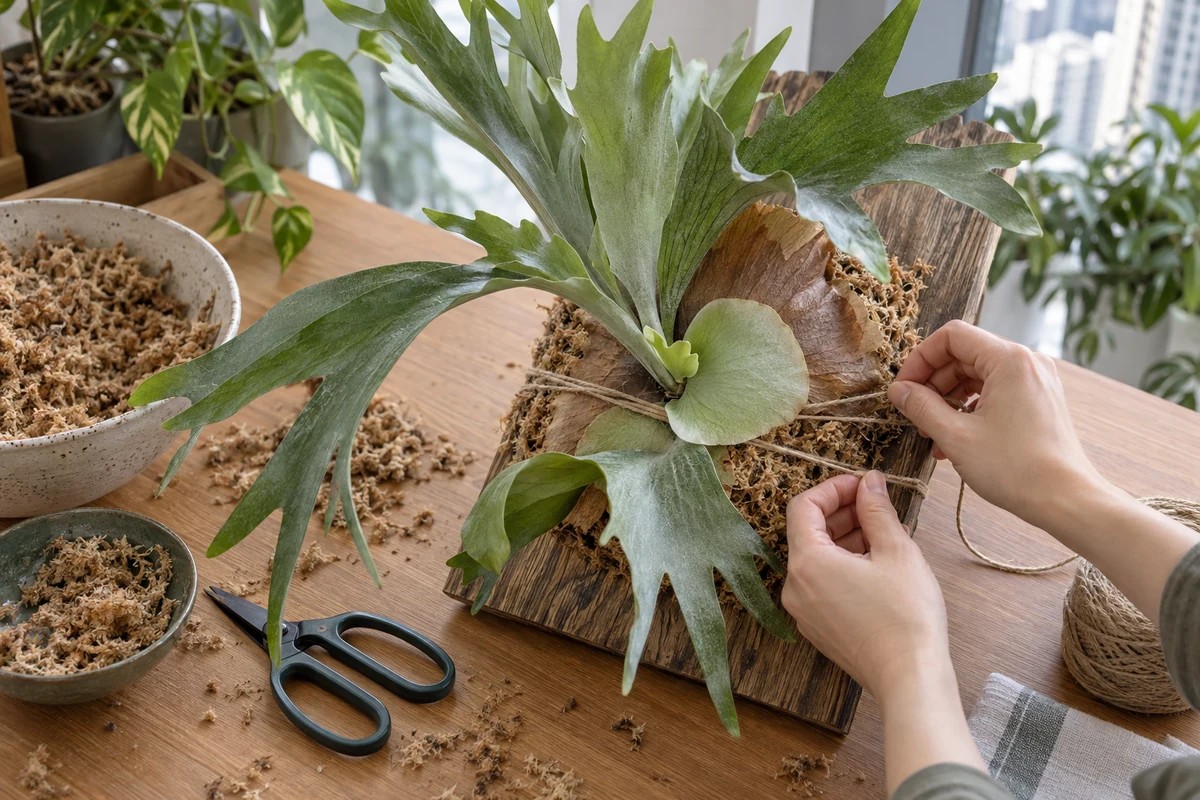
Before mounting a staghorn fern, protect its growing point, root mass and existing shield fronds. Use a suitable board, a modest moisture-holding layer and fastening that stabilises without cutting into the plant. Do not bury a tender growing point or strip brown shields to create a clean-looking base. The finished mount still needs access for watering, drainage and inspection.
Recognise three different structures
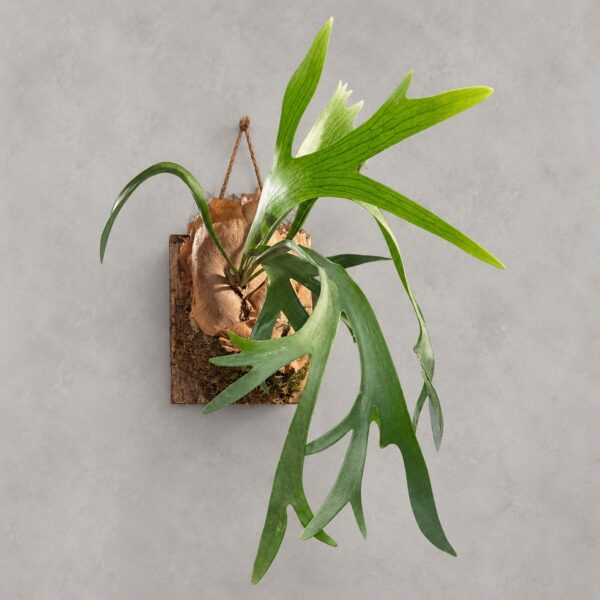
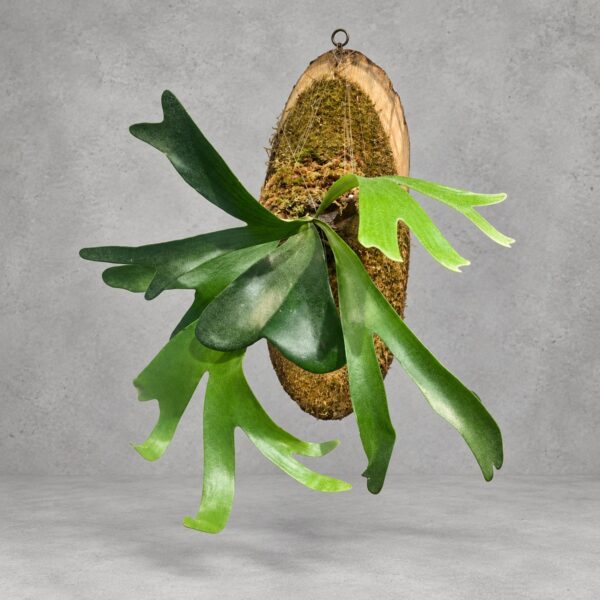
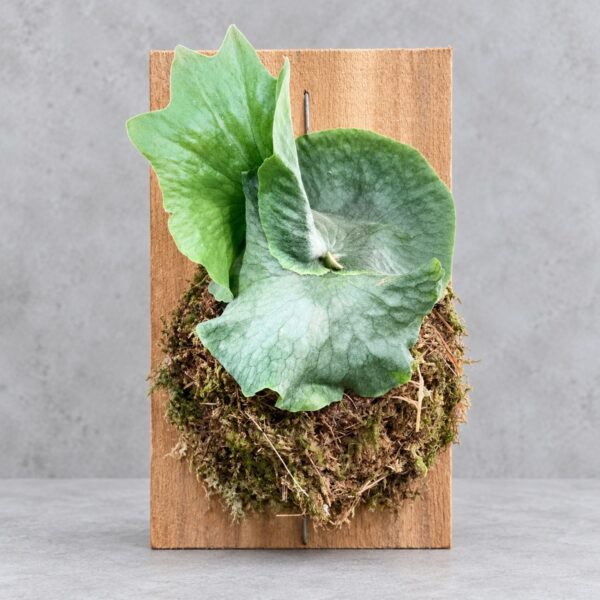
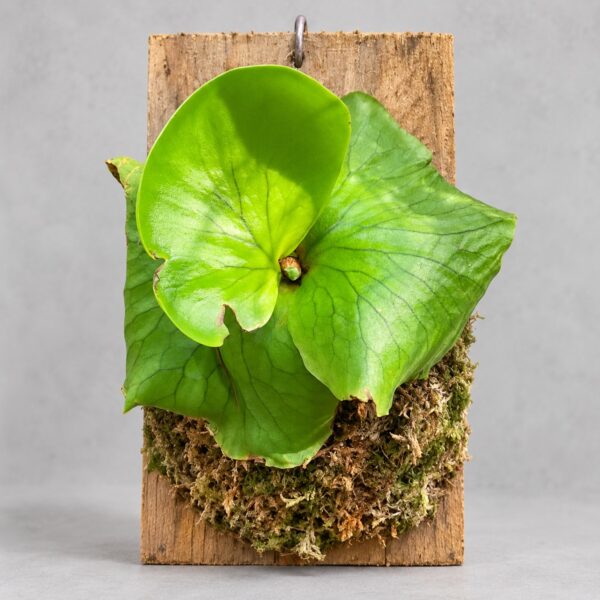
Shield fronds lie against the base, protect the roots and help collect organic material. Turning dry and brown can be part of their normal maturation. The projecting antler-like fronds are another leaf type; mature undersides may develop reproductive patches. The growing point is where new fronds emerge and must remain clear of ties and packing.
Photograph the front and side to understand the root mass’s orientation and the space future fronds will use. Do not classify every hidden brown structure as a rotten root or every dry shield as litter to remove. A wet, soft base, abnormal discharge or rotten smell needs attention first; enclosing it on a board is not a treatment.
Reference: University of Florida IFAS — Staghorn Fern
Test the board and hanging position first
The board and hardware must suit a damp setting and support the plant, wet medium and board together. Choose stable material without unknown chemical treatments, and avoid protruding fasteners that can injure someone or scratch the wall. If you cannot assess the wall and fixing, have suitable hardware installed rather than relying on an improvised adhesive hook.
Test the empty board in the intended position: remove it, carry it to a draining area and replace it. The fern needs appropriate bright indirect light; the most picture-like wall position may be too dark. Leave room for frond expansion and for managing moisture between mount and wall rather than keeping wet media pressed against the surface.
Four priorities during mounting
- Retain the healthy root mass: remove only loose excess medium, rather than washing roots bare or cutting them thin for a flat display.
- Use a modest medium layer: choose an epiphytic medium that holds moisture while remaining airy; moisten and drain it before use rather than building a dense wet ball.
- Keep the growing point clear: seat the root mass securely with room for tender growth and new shields.
- Fasten without constriction: stabilise the base with suitably broad, soft material, avoiding thin line or wire cutting into living tissue.
Size and existing form determine the fastening route; one pattern cannot fit every fern. If securing the plant requires crushing a young shield, change the support points instead of tightening the tie.
Reference: University of Florida IFAS — DIY Staghorn Mounting
Watch the old root mass and new moss separately
The original potting medium may be denser and slower to dry than fresh moss around it. After mounting, the outer layer may pale while the centre is still wet. Watering whenever the outside dries can keep the original root mass saturated. Conversely, a damp outer layer does not prove that the old root mass has absorbed water.
For the first few waterings, observe mount weight, accessible medium and drainage. Do not peel shields apart to inspect the centre daily. Avoid combining mounting with stronger light, feeding and division. Fewer simultaneous changes make adjustment to the new moisture pattern easier to evaluate.
Maintenance begins after hanging
Let excess water leave both board and medium before rehanging. The root mass should not remain submerged, and the wall should not collect continuous drips. Each removal is an opportunity to check constriction, board softening, loose hardware and whether a fastener blocks an emerging shield.
As attachment develops, the original material may age or become tight as the plant grows. Do not assume a particular tie will fail at exactly the right time. Support the whole plant before adjusting it and move fastening points progressively rather than cutting every support at once.
Potted plant or an established mount?
Mounting it yourself suits someone willing to assess the root mass, arrange drainage and adjust fastening. If your home lacks a workspace or watering area, keeping a manageable potted fern is reasonable. For a ready-mounted plant, ask whether it is rooted onto the support, what hardware is included and how the wet mount is handled.
Do not decide from the front photograph alone. Inspect side thickness, rear fastening and the actual removal method. An attractive front does not establish structural reliability at the back. This is a decision sequence, not a claim that any listed product includes mounting service or suits an existing wall hook.
Sources and scope
- University of Florida IFAS — Staghorn Fern — Shield fronds, fertile fronds and natural surface hairs. Do not rub off hairs or assume identical sizes and moisture needs across species.
- University of Florida IFAS — DIY Staghorn Mounting — Basic mounting, medium and fastening. Choose hardware for the actual board, wall and wet weight.
Further reading
Related Plantjai plants
- Platycerium bifurcatum
Its shield and branching fronds directly illustrate the mounting checks. Confirm whether the actual plant is potted or mounted; do not assume a board or installation is included.
IN STORE NOW
Plants for this guide
Related plants in stock now — live prices, delivery or Causeway Bay pickup.
Platycerium alcicorne
Platycerium alcicorne (Willemet) Desv.
HK$580.00
In stock · store pickup
View plant
FREE PLANT ADVICE
Send us a photo before you change anything
WhatsApp a photo of the plant and your window light. Our Causeway Bay team will suggest care steps or plants that suit your space.
STORE · CAUSEWAY BAY
4/F, 39 Yiu Wa Street, Causeway Bay
Daily 12:30–8:00pm · ~3 min walk from Times Square
Map & directionsPlant Care